Enable BIOS / UEFI Virtualization setting when you can't find it on Windows 10
I recently had trouble installing Docker on my Windows 10 HP Folio Ultrabook machine. The reason is that Virtualization and Hyper-v were not enabled. To enable VTx, I have to access UEFI virtualization settings via the BIOS.
However, accessing the UEFI settings was a unique problem. I couldn't find the BIOS/UEFI settings by following the standard steps.
It took me a while to be able to enable the virtualization on my computer.

So in case, you are also having trouble enabling virtualization on your computer, here are the steps I took.
Step 1: Access your BIOS Menu
The first thing I did was turn off my PC and restart it. Following that, I quickly pressed the Escape key "ESC" until the BIOS menu came up. Then I pressed F10 (yours may be different) to select the BIOS Setup.

Now am in the BIOS menu.
Step 2: System Configuration
Depending on your system, you may see the options here, but for mine, I clicked on the System Configuration Tab at the top of the screen. This leads me to the last step.
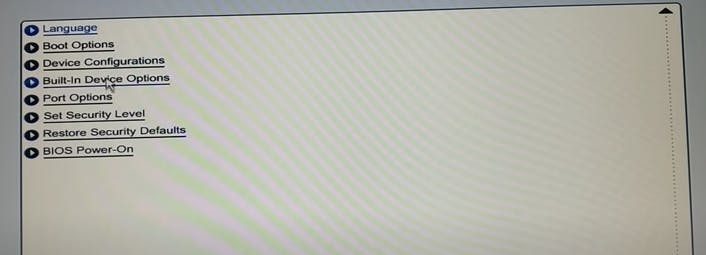
Step 3: Device Configurations

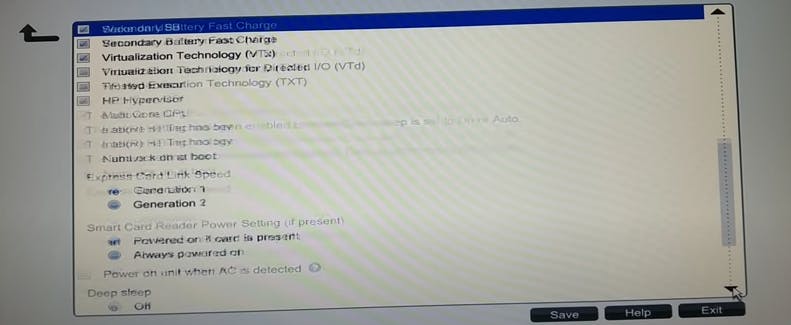
Now on some systems, you are going to see the virtualization option on the list, but I couldn't find it on my own system. I found it in the Device Configurations menu before scrolling down a little to enable the Virtualization.

To enable it, simply check the Virtualization Technology (VTx) option. Then save and exit (make sure you agree "yes" to save changes).
PS: Next to the Virtualization Technology (VTx) there is Virtualization Technology for Directed I/O (VTd), you may need to check this if after checking only the VTx option your virtualization wasn't enabled.
Verifying the changes
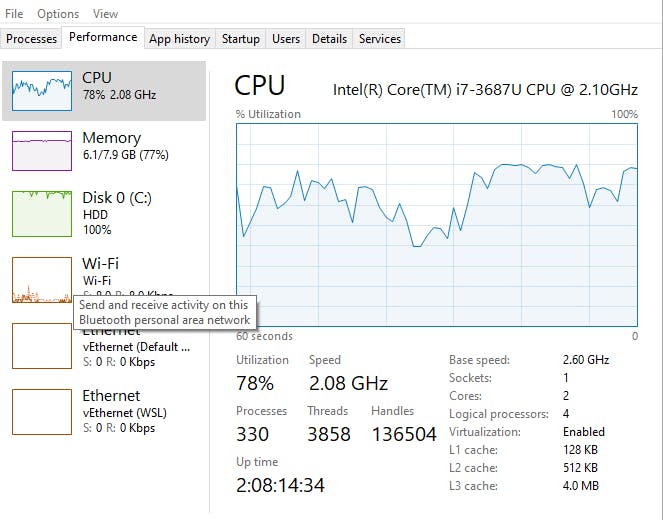
Now, restart your PC and open up the Task Monitor. Click on the Performance tab and scroll down to see if Virtualization has been enabled, by now you should see the changes.
Good luck installing Docker.
Use the comment box below in case you are having any issues.